| part |
|---|
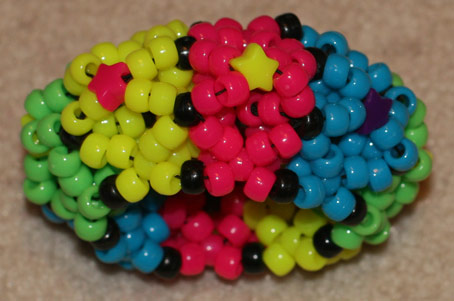
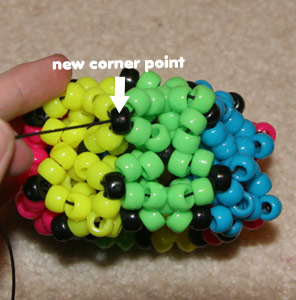 Step 18:Once you're done making the pyramids on the second half of the cuff, thread your string so that it's coming out of a black "top-of-pyramid" bead. We will now be making a final set of pyramids, and the black "top-of-pyramid" beads will be the points where we thread our string through. 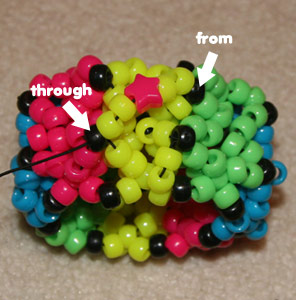 Step 19:Our final layer of pyramids is done in the same way as the other two layers. We string five beads at a time, with a shaped bead in the middle (substitute a black bead if you don't have any shaped ones). The colored beads you string should match the segment you're threading over. My first segment is yellow. Yours may be different. 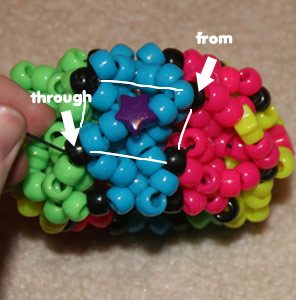 Step 20:Continue working your way around the cuff stringing 5-bead diagonal lines, using the black "top-of-pyramid" beads as your connectors. You will always be stringing diagonally. Make sure that the shaped bead you string always rests in the middle of the "square" formed by the black beads (I drew lines to highlight the square). 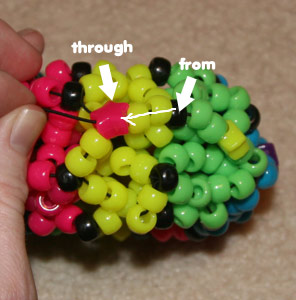 Step 21:When you get to the end of the row, pull through the black connector bead as usual. Then, work your way over so your string is coming out of a shaped bead. The path I took is shown. 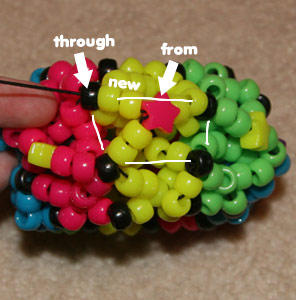 Step 22:Now we just have to string two beads at a time to finish our pyramids, matching the bead colors with the segment. The shaped beads will be the top of the pyramids. Thread your string from the shaped bead and through the nearest corner point of the imaginary square (highlighted). 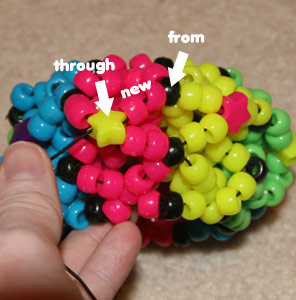 Step 23:Continue stringing two beads at a time to make your row of pyramids. You will always be stringing diagonally, in this order: From corner point to shaped bead, from shaped bead to corner point, repeat. 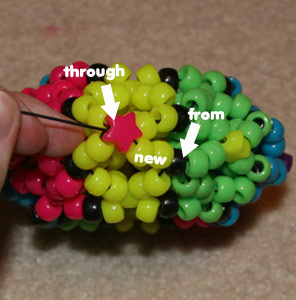 Step 24:When you get to the end of the row, pull through the necessary bead as usual. In my case, it's a shaped bead, and it will probably be the shaped bead for you too.  Step 25:Now we just need to work our bead to the bottom of the cuff, so we can tie it off. Thread your bead down diagonally so it's coming out of one of the black corner beads of the top pyramid layer... 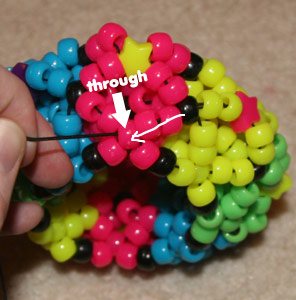 Step 26:...then thread it down more so that it's coming out of one of the bottom "nook" beads.  Step 27:Next, thread your string down and underneath the string of the bottom row, so the end is coming out from inside the cuff. Don't pull it all the way through; leave a loop as shown. 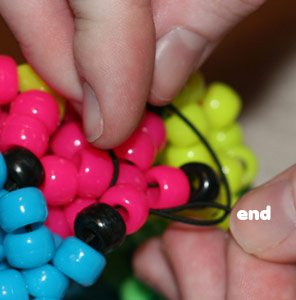 Step 28:This picture isn't super clear, but pull the end of your string up through the loop you've just made. You will be going over the string of the bottom row to go up through the loop. 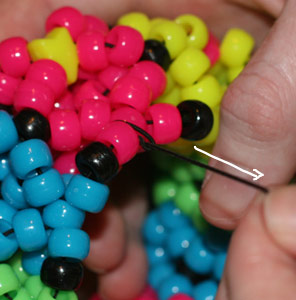 Step 29:Make sure that you have not looped around a bead. You should only have looped around the string of the bottom row. Then pull the string tightly, so that you create a knot. Repeat the process of steps 27-29 one or two more times to secure the knot, then trim the excess string. You're done!Your 3D cuff is now finished! Here's how mine turned out:
If you're proud of how your 3D cuff turned out, feel free to submit a photo of it to the photo gallery. |

Login / Register
Active Threads
Random Pattern