


| part | |||||||||||||||||||||
|---|---|---|---|---|---|---|---|---|---|---|---|---|---|---|---|---|---|---|---|---|---|
Starting Row 3
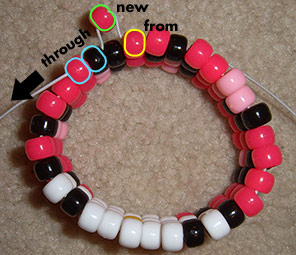
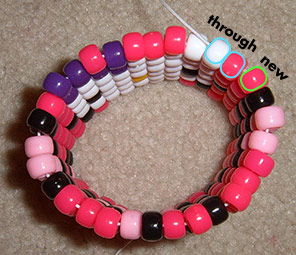
Row 3 is where it starts to get easier, because you'll be able to see where the beads dip down, leaving space for the new bead you're going to add.  Row 3 - Bead 1Looking at the bead line above, you'll see that the first bead in row 3 is black. Look back to the pattern and chart, and you'll see that this is because for the third row, we start at the second bead in the pattern. We come from hot pink bead, skip a black bead, and go through a light pink bead. Pull tightly after adding the bead (not shown). 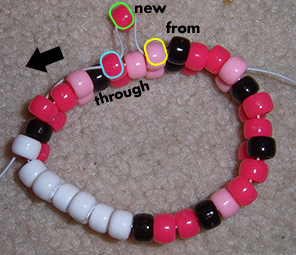 Row 3 - Bead 2Bead 2 on the third row is hot pink. We come from a light pink bead, skip a light pink bead, and go through a hot pink bead. Pull tightly after you've added the bead (not shown). Bead 3 will be black. You'll be coming from a hot pink bead, skipping a black bead, and going through a light pink bead. Finish stringing the rest of row, and I'll give you more directions once you get to the last bead (15), which will be a black one. 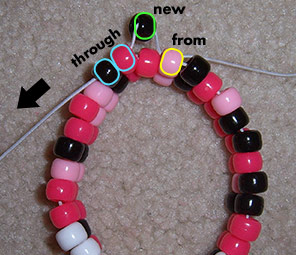 Row 3 - Bead 15This bead will be the end of the row, so remember that we will have to pull through two beads at the end. We come from a light pink bead, skip a hot pink, and then pull through a hot pink and black bead. Pull tightly. 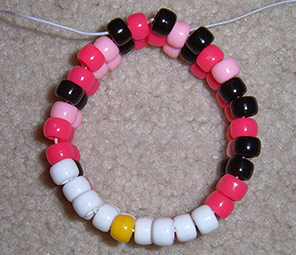 Row 3 complete!Row 3 is now complete. Do row 4 yourself based on the pattern and bead line below, and I'll return with instructions for the last bead. Tip: for bead 1 (black) you'll skip a light pink bead and string through a hot pink one. Row 4
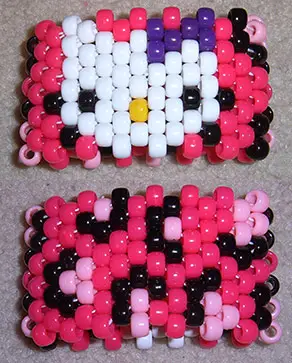
 Row 4, Bead 15Our last bead is a hot pink one. We're coming from a black bead, skipping a hot pink bead, and pulling through two black beads. 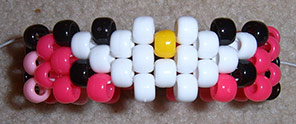 Row 4 complete!After this row, your kandi cuff should be starting to look like Hello Kitty! Row 5Do row 5 yourself based on the pattern and bead line below, and I'll return with instructions for the last bead.
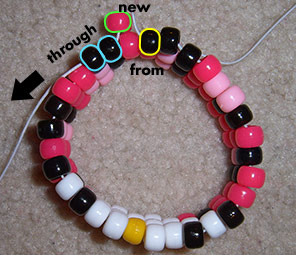
 Row 5, Bead 15Our last bead is a hot pink one. We'll be coming from a hot pink bead, skipping a black bead, and pulling through a black bead and hot pink bead. Pull tight. I'm now going to let you do the rest of the rows yourself, following the bead lines below. When you get to the end, I'll show you how to tie off your cuff. Remember, simply string the beads in the order they're shown. And when you get to the last bead, you'll be pulling through two beads to end the row. Here's a chart of the beads you will be pulling through at the end of each row, so you can be sure you're on the right track (note, there's no easy way of telling from just the pattern which beads you'll be pulling through; you have to see as you go along)
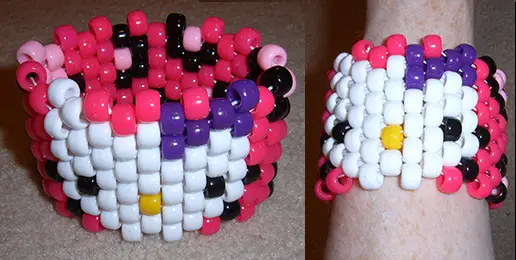
 End of the last row (row 11) - Bead 15Once you've strung bead 15 on row 11 (a hot pink bead), you should have pulled through a hot pink and white bead. This means that at the end, your string should be coming out of a white bead. 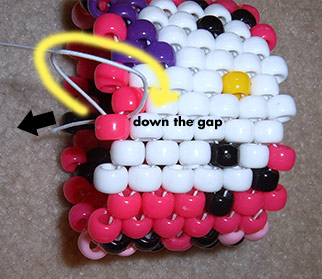 Tying off your cuff - top endThere are a few ways to tie off a cuff, so do whatever works best for you. But this is how I do it. Take the end of your string, and push it down between a gap in a nearby bead. Then grab the end and pull it up so it's visible from the top of the cuff. 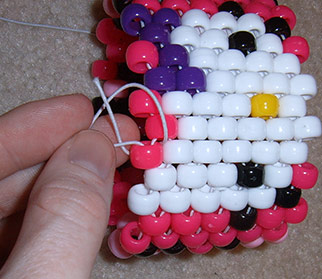 Next, fold the end up and pull it through the loop. Pull tightly and you will have made a knot. Make 1-2 more knots, then trim the excess string and pull the knot inside a nearby bead to hide it. Repeat this process for the end of string leftover at the bottom end of the cuff. The final result: Hello Kitty Kandi Cuff!
Ran out of string? Here's how to tie more onDisregard the "old" and "new" labels if they confuse you. It's probably easier to go by which strings are on the right and left once you get past the first step.  Step 1:Cut off a new piece of string, and hold it over the top of the old string in an X. 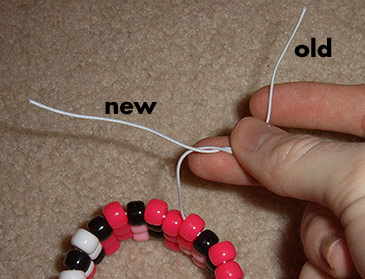 Step 2:Fold the new piece of string underneath the old string, and flip both ends up. This will cause the new string to be on the left, and the old on the right. 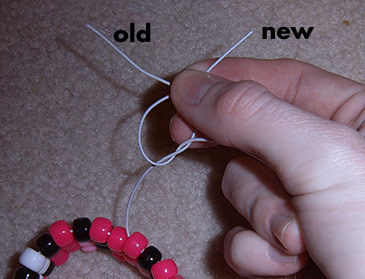 Step 3:Next, hold the string on the right over the string on the left. Fold the right string under and through the loop you've just made and pull tight to create a knot. Repeat this process to create 1-2 more knots. When you're finished, trim the excess string and pull the knot into the nearest bead to hide it. |


Login / Register
Active Threads
- I accidentally blocked everyone
- I've been meddling
- Questions I'm sick of?
- Just made MORE Warrior Cats perler patterns!I made all of them (including bloodclan!)
- hard decision
- Just made some Warrior Cats perler patterns bcs i miss reading the books lol
- just made my first perler in a really long time!
- Just made some kandi cron beads
Random Pattern
