How to make kandi cuffs!
This tutorial will teach you how to make a basic kandi cuff that can be turned into a 3D cuff if desired. This type of cuff is also called an X cuff because of the Xs that form.
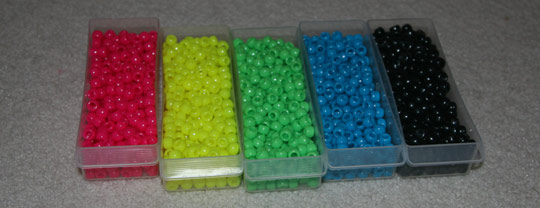
Supplies needed: (lots of) string, scissors, five different colors of pony beads, and 8 shaped beads (if possible). This cuff will be 32 beads around, which will fit someone with a small-medium wrist. If you need to make it bigger, increase with increments of 4.
If you run out of string, click here to learn how to tie more on.
Please do not post this tutorial on other websites, but you may link to it.
Step 1:
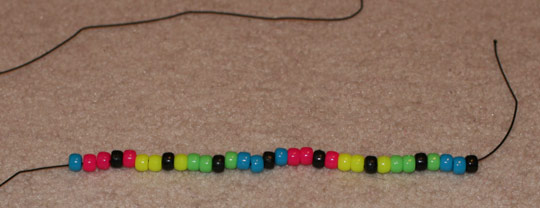
Cut a long piece of string - as long as you are comfortable working with. You can always tie on more later. Then string 32 beads in the order shown below, and move the short end of the string to the right hand side.
Step 2:
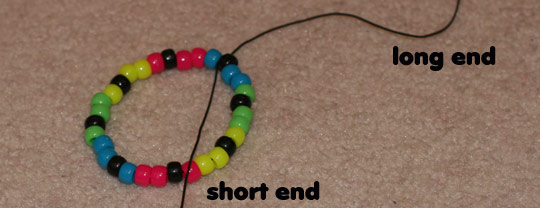
Tie the two ends together, making 2-3 knots.
Step 3:
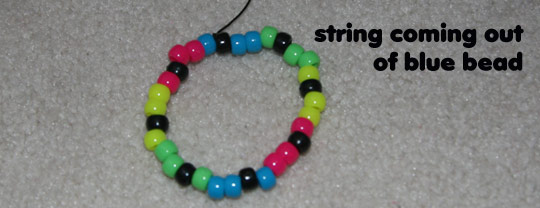
Cut the excess string from the short end, as close to the knot as possible. You should be left with one piece of string coming out of a blue bead.
Step 4:
Pull the string through the nearest black bead.

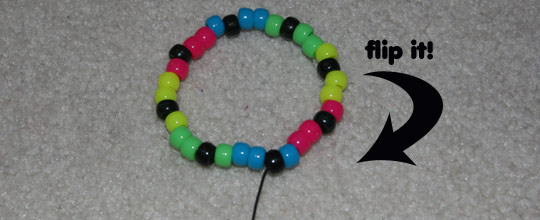
Step 5:
Turn the bracelet around so the string is closest to you (this just makes it easier to work with)
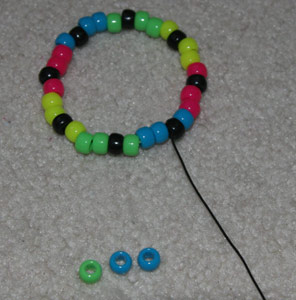
Step 6:
To make the second row, you'll be stringing 3 beads at a time, using the black beads as the "connector" beads - the beads you pull the string through. Just match up the bead colors with each section. For the first segment, we'll first be stringing two blue beads, and one green bead.
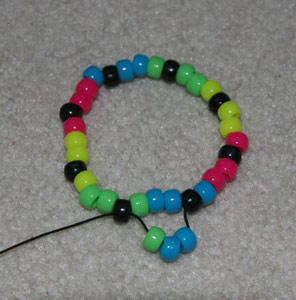

Step 8:
Pull the string tightly so the beads snap into place.

Step 9:
Thread the next three beads - which will be green, green, yellow, and then pull through the next black bead. Pull tightly again. Hopefully you can understand how the colors match up now. You basically just want the first and second rows to mirror each other.
The next segment will go yellow, yellow, pink. The one after that will go pink, pink, blue.
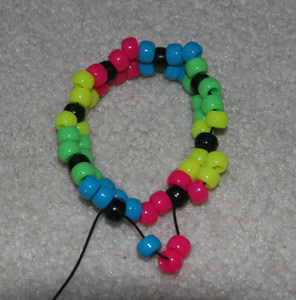
Step 10:
You'll know when you're at the end of the row because you'll have eight segments of three beads each, with black connector beads in between. When you get to the end of the row, pull through the next black bead as usual.
Step 11:
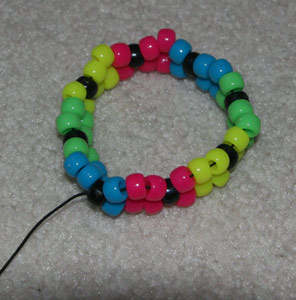
Pull tightly, and you now have what's called a double.
Step 13:
For the third row, each three beads that we string will be the same color, and will match up with the bead that we string through (not from).
String three green beads.
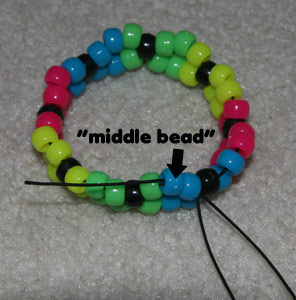
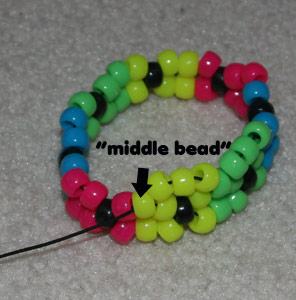
Step 14:
Pull the string through the nearest "middle bead," which should be green. Pull tightly.
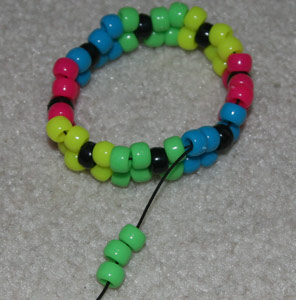
Step 15:
The next three beads you string will be yellow, because the next "middle bead" you'll string through is also yellow. Pull tightly.
Step 16:
The next three beads you string will be yellow, because the next "middle bead" you'll string through is also yellow. Pull tightly.
Hopefully you can see the pattern. The next three beads you string will be pink, then blue, then green, etc.
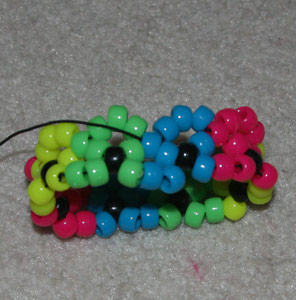
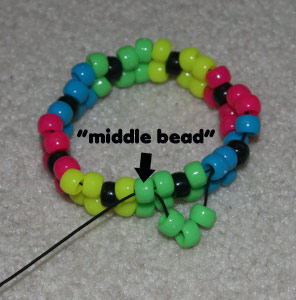
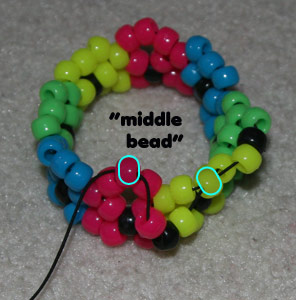
Step 17:
When you get to the end of the row, pull through the "middle bead" as usual. Pull tightly. Your cuff should now resemble a tiara or crown
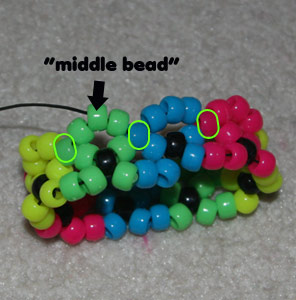
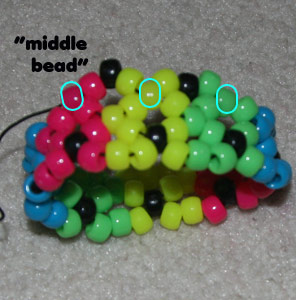
Step 18:
For the 4th row, we will again be stringing three beads at a time. And again, we'll be stringing through the "middle bead" of each 3-bead segment. The old "middle beads" are outlined in green. The new "middle beads" will be outlined in aqua.
To start the 4th row, pull your string through the nearest middle bead (without stringing a new bead).
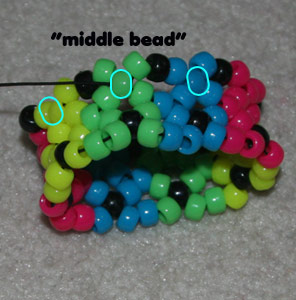
Step 19:
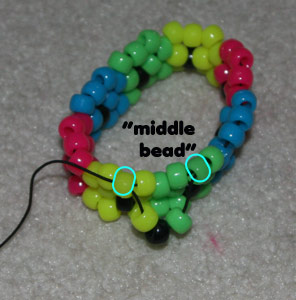
For the 4th row, you'll be stringing three beads, each a different color. The 1st bead color should match the bead you're coming from, the middle bead color should be black, and the 3rd bead color should match the bead you're going through.
Again, you'll always be coming from and going through the "middle bead" of each segment (highlighted in aqua).
In this case, I'm coming from a green bead, and pulling through a yellow bead, so my beads go green, black, yellow.
Step 20:
For the next three beads, I'm coming from a yellow bead and going through a pink "middle bead," so the beads I'm stringing are yellow, black, pink.
Step 21:
Pull tightly.
I hope you can see the pattern now. The next three beads you string will be pink, black, blue. Then blue, black, green.
Step 22:
Continue stringing beads. When you get to the end of the row, pull tightly.
My string is now coming out through a green "middle bead."
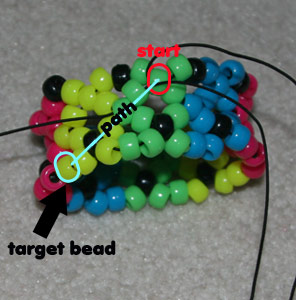
Step 23:
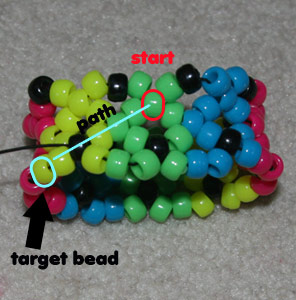
We've now completed one half of the base cuff, and need to do the other half. I could continue working upward, but I like to weave back down because it helps me picture the cuff in halves.
So, I'm aiming for the bead outlined in aqua. Weave your string down diagonally through the path shown, until you get to the target bead.
Step 24:
This picture just shows the process of me threading the string diagonally. I'm aiming for the target bead, currently coming through that black bead.
Step 25:
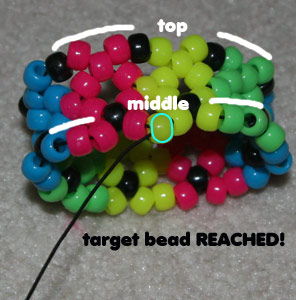
Target bead reached! Now we have to finish the 2nd half of the base cuff.
To do this, we need to work downward from the middle, creating a mirror image of the top half. To do this, we just have to repeat the steps we followed for rows 3 and 4 of the first half.

Step 26:
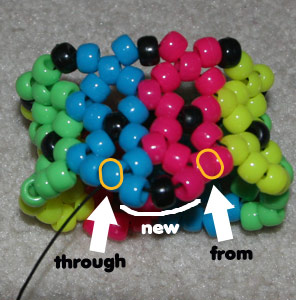
For our second row 3, we will again be stringing 3 same-color beads at a time, using the middle bead of each segment of the last row as our "connector" beads (marked in bright green).
The first segment will be composed of three pink beads, because pink is the color bead we are stringing through. It should be obvious what color to use to match up the stripes.
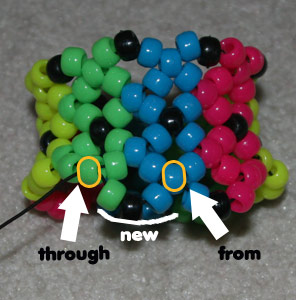
Step 27:
The next segment will be composed of three blue beads, because the connector bead we're stringing through is blue.
Continue stringing three-bead segments. The next segments will be green, then yellow, then pink, etc.
Step 28:
When you get to the end, pull through the connector bead as usual (marked as the yellow "through" bead in this pic). Pull tightly.
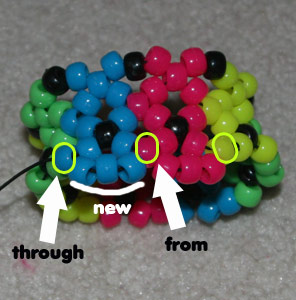
Step 29:
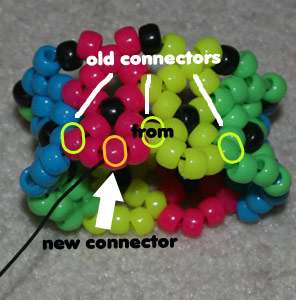
Then we need to work our way over to the next connector bead, which will again be the "middle" bead of each segment.
In this picture I have marked the bead where your string is coming from as "from," and the new connector bead you're aiming for is circled in orange.
The OLD connector beads (from the last row) are circled in green.
Step 30:
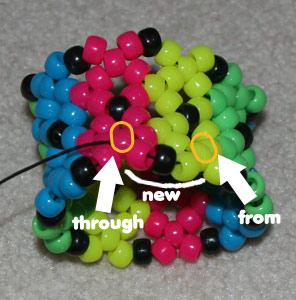
This next row will basically be a mirror of row 4. If you remember, this was the row where we put on one colored bead, a black bead, and another colored bead.
The 1st bead color should match the bead you're coming from, the middle bead color should be black, and the 3rd bead color should match the bead you're going through.
Again, you'll always be coming from and going through the "middle bead" of each segment (highlighted in orange).
I'm coming from a pink bead, and pulling through a blue bead, so my beads go pink, black, blue.
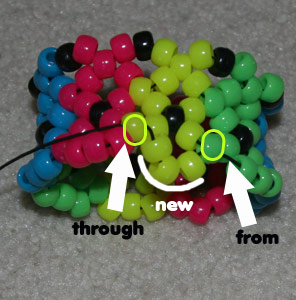
Step 31:
For the next three beads, I'm coming from a blue bead and going through a green "middle bead," so the beads I'm stringing are blue, black, green.
Pull tightly after each 3-bead segment, and continue beading the rest of this row. The next segment will be green, black, yellow.
Step 32:
When you get to the end of the row, pull through the connector bead as usual. Pull tightly.
You are now done with the base cuff! You can stop here, and go to the tying off segment of the 3d cuff page to learn how to tie off the cuff. Or you can turn the cuff into a 3D by reading onto the 3d kandi cuff tutorial.